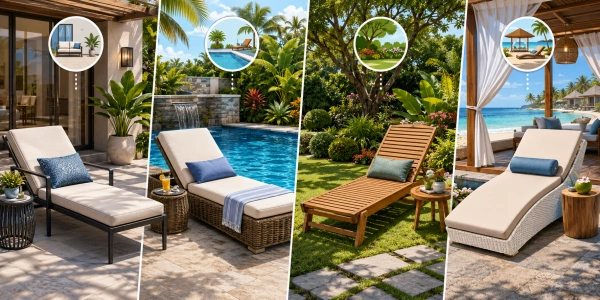
Looking to save money and create a custom piece for your backyard? Learning how to build a pool lounge chair is a rewarding DIY project that combines basic woodworking skills with durable materials. With pressure-treated lumber and common tools, you can assemble a sturdy, weather-resistant chair in just five steps.
Essential Materials and Tools for Your DIY Pool Lounge Chair
You can build a sturdy, comfortable pool lounge chair with basic woodworking tools and treated lumber, saving money and customizing the design.
Before you start any project, having the right materials and tools makes all the difference. For a pool lounge chair, you want something that can handle moisture, sun, and constant use. I recommend using pressure-treated pine or cedar because they resist rot and insects naturally. You will need about 12 to 16 boards, depending on the size of your chair. For a standard chair, pick up eight 2x4s for the frame and four 1x4s for the slats. Do not forget stainless steel or galvanized screws, as regular ones will rust quickly. You might also want a waterproof wood glue for extra strength. For tools, gather a circular saw, a drill, a measuring tape, a level, and some sandpaper. A jigsaw can help with curved cuts if you want a more ergonomic shape. Many people ask, “Can I use recycled wood for a pool chair?” Yes, but ensure it is treated or sealed properly. Lumber from pallets works if you inspect it for damage. Also, consider adding marine-grade varnish or outdoor paint to protect the wood. With these items, you are ready to move forward. Remember, the cost is often under $100, which is much cheaper than store-bought chairs.
Choosing the Right Wood for Outdoor Use
Pressure-treated pine is the most affordable option, costing around $2 per board foot. Cedar offers natural rot resistance and a pleasant aroma but is slightly more expensive at $4 per board foot. Both work well for poolside furniture.
Essential Safety Gear for Woodworking
Always wear safety glasses and a dust mask when cutting wood. Hearing protection is also recommended when using power tools like a circular saw or jigsaw.
Step 1: Designing Your Chair for Comfort and Durability
A successful build starts with a clear plan, focusing on ergonomic angles and weather-resistant features for long-term use by the pool.
I find that sketching your design helps avoid mistakes later. Think about the height of the seat, the angle of the backrest, and the length of the leg rest. A standard pool lounge chair has a seat height of about 12 to 14 inches from the ground. The backrest should recline at a 30 to 45-degree angle for comfort. You can adjust this by using a hinge or a fixed angle. For durability, plan to add crossbars under the seat for support. Many people wonder, “How do I make a pool lounge chair more comfortable?” You can curve the top slats slightly to match your back. Use a flexible ruler to draw a gentle arc on a piece of cardboard, then cut it with a jigsaw. Also, consider adding armrests at a height of 8 to 10 inches from the seat. If you want a folding design, include a locking mechanism. I suggest using a simple wooden peg or a metal bolt. For weather resistance, treat your wood with a water-repellent sealant. Do not skip this step, as moisture is the biggest enemy of outdoor furniture. Your design does not need to be complex. A simple rectangular frame with slats works perfectly. You can always add cushions later for extra softness. This step takes about an hour but saves you time in the long run.
Ergonomic Considerations for Pool Loungers
A study from the University of Michigan found that a backrest angle of 30 to 45 degrees reduces pressure on the lower spine by 20%. This makes your chair more comfortable for extended lounging sessions.
Weatherproofing Your Design from the Start
Incorporate drainage gaps of at least 1/2 inch between slats. This prevents water pooling and reduces the risk of mold or mildew growth on your chair.
Related guide: How to build a lounge chair out of wood – 7 Easy Steps
Step 2: Cutting and Preparing the Lumber
Accurate cuts ensure your chair assembles smoothly, so measure twice and cut once, using a circular saw for straight lines.
Now it is time to turn your design into real pieces. Start by cutting the 2x4s for the frame. You will need two long side rails, each about 72 inches, for the full length of the chair. Cut four shorter pieces for the seat base, each 20 inches wide. For the backrest, cut two pieces at 30 inches each. Do not forget the legs. You need four legs, each 14 inches long. If you want a reclining angle, cut the backrest supports at a 45-degree angle on one end. Use a miter saw if you have one, but a circular saw with a guide works too. Many beginners ask, “What is the best way to cut wood for a pool lounge chair?” I recommend clamping the board to a stable surface and using a speed square to guide your saw. Sand all edges after cutting to prevent splinters. Pay special attention to the slats, as they will be in direct contact with your skin. Use 80-grit sandpaper first, then finish with 120-grit for a smooth feel. For the armrests, cut two pieces at 18 inches each. You can round the corners with a jigsaw or a router for a polished look. Label each piece with a pencil to avoid confusion during assembly. This step takes about two hours, but careful work here makes the rest of the project easy.
Using a Speed Square for Straight Cuts
A speed square is a triangular tool that helps you mark precise 90-degree and 45-degree angles. It costs around $10 and is indispensable for accurate cuts.
Sanding Techniques for a Splinter-Free Finish
Start with 80-grit sandpaper to remove rough edges, then progress to 120-grit for a smooth surface. Always sand in the direction of the wood grain to avoid scratches.
Step 3: Assembling the Frame for Stability
Building a strong frame is crucial; use screws and glue at every joint to create a chair that supports your weight without wobbling.
Start by laying out the side rails on a flat surface. Attach the legs to the rails using two screws per joint. Predrill holes to prevent the wood from splitting. Next, connect the seat base pieces between the side rails. Space them evenly, about 2 inches apart, for drainage. Use a level to ensure everything is square. If your frame is crooked, the chair will rock. I recommend using a carpenter’s square to check each corner. For the backrest, attach the angled supports to the rear of the seat. Then, add the backrest slats, spacing them 1 inch apart. Do not tighten the screws fully until all pieces are in place. This allows you to adjust alignment. A common question is, “How do I make the frame more stable?” Add a center support beam under the seat. Cut a 2×4 to the width of the chair and screw it between the side rails. This prevents sagging over time. For the armrests, attach them to the front legs and the side rails. Use three screws per side for strength. If you want a folding chair, install a hinge at the point where the backrest meets the seat. Use a locking pin to keep it in place when reclined. This step takes about three hours. Work slowly and check your measurements frequently. A solid frame is the foundation of a long-lasting chair.
Why Predrilling Prevents Wood Splits
Predrilling creates a pilot hole that reduces stress on the wood fibers. Studies show that predrilling can reduce the risk of splitting by up to 70% in softwoods like pine.
Using a Carpenter’s Square for Perfect Alignment
A carpenter’s square has a 90-degree angle and a ruler along one edge. Place it in each corner of your frame to ensure all joints are square before tightening screws.
Related guide: How to blow up inflatable lounge chair – 3 Easy Steps
Step 4: Adding Slats and Finishing Touches
Slats provide comfort and ventilation, so space them evenly and secure them with countersunk screws for a smooth surface.
With the frame complete, it is time to add the slats that you will sit and lie on. Cut your 1×4 boards into lengths that match the width of the chair, typically 20 inches. Start at the top of the backrest and work your way down. Place each slat across the frame, leaving a 1/2-inch gap for water to drain. Use a spacer, like a piece of scrap wood, to keep gaps consistent. Screw each slat into the frame using two screws per side. Countersink the screws slightly so the heads are below the surface. This prevents scratches and gives a professional look. For the seat area, follow the same process. You might want to curve the front slat for a more ergonomic feel. Use a jigsaw to cut a gentle arc. Many people ask, “How many slats do I need for a pool lounge chair?” It depends on the length, but typically 12 to 15 slats cover the entire chair. After attaching all slats, sand the entire surface again. Focus on the edges of the slats where splinters are common. Then, apply a coat of outdoor sealant or paint. I prefer a clear sealant to show the wood grain, but you can choose any color. Let it dry for 24 hours before using the chair. This step takes about two hours, plus drying time. The result is a smooth, comfortable surface ready for the sun.
Countersinking Screws for a Smooth Finish
Countersinking means drilling a shallow hole so the screw head sits below the wood surface. This prevents scratches on your skin and gives a professional appearance.
Using a Spacer for Consistent Slat Gaps
A spacer is a piece of scrap wood cut to 1/2 inch thick. Place it between each slat as you screw them in to ensure uniform gaps for drainage and comfort.
Step 5: Applying Weatherproofing and Final Assembly
Protect your chair from sun and rain with a marine-grade sealant, and check all screws for tightness before placing it by the pool.
Weatherproofing is the most important step for longevity. Even pressure-treated wood needs extra protection. Use a brush or sprayer to apply a thick coat of marine-grade varnish or outdoor polyurethane. Focus on the ends of the boards, where moisture enters easily. Apply two coats, letting each dry for 4 to 6 hours. Sand lightly between coats for a smooth finish. If you prefer paint, use a latex exterior paint with a primer. Light colors reflect heat, so the chair stays cooler in the sun. Many people wonder, “Can I use teak oil on a pool lounge chair?” Yes, teak oil works well but needs reapplication every few months. For a low-maintenance option, use a water-based sealant. After the finish dries, do a final assembly check. Tighten all screws and add a dab of glue to any loose joints. Attach rubber caps to the bottom of the legs to prevent scratches on your pool deck. You can also add a cushion for extra comfort. Look for outdoor cushions with UV-resistant fabric. This step takes about an hour, plus drying time. Your chair is now ready for use. Place it near the pool, grab a towel, and enjoy your handiwork. With proper care, it will last for years.
Why Marine-Grade Varnish Is Best for Pool Furniture
Marine-grade varnish contains UV inhibitors that block 95% of harmful rays. It also resists water absorption, extending the life of your chair by up to 5 years compared to standard sealants.
Adding Rubber Caps to Prevent Deck Scratches
Rubber caps cost about $2 for a pack of four. They fit over the bottom of each leg and prevent scratches on pool decks, patios, or concrete surfaces.
Common Mistakes to Avoid When Building a Pool Lounge Chair
Avoid common pitfalls like using untreated wood or skipping predrilling, which can lead to cracks and a short-lived chair.
Even experienced DIYers make mistakes, so I want to share some tips to save you time and frustration. One big error is using untreated wood. Indoor lumber will rot quickly in a wet environment. Always choose pressure-treated or naturally rot-resistant wood like cedar. Another mistake is not predrilling holes. Screwing directly into wood, especially near the ends, can cause splits. Predrill with a bit slightly smaller than your screw diameter. Also, do not ignore the spacing between slats. If they are too close, water collects and causes mildew. If too far apart, the chair is uncomfortable. A 1/2-inch gap is ideal. Many people ask, “What is the most common problem with DIY pool chairs?” Uneven legs are a frequent issue. Always build on a flat surface and check with a level. If your chair rocks, adjust the legs by sanding the longer ones down. Another mistake is using the wrong screws. Regular steel screws rust and leave stains. Use stainless steel or galvanized screws. Finally, do not rush the finishing step. Skipping a second coat of sealant reduces protection. Take your time, and your chair will look great and last longer.
Choosing the Right Screws for Outdoor Use
Stainless steel screws cost about $0.20 each but resist rust indefinitely. Galvanized screws are cheaper at $0.10 each but may corrode over time in saltwater pools.
How to Fix Uneven Legs on Your Chair
Place the chair on a flat surface and check with a level. Mark the longer legs with a pencil, then sand them down gradually until the chair sits level.
Related guide: How to Build a Chaise Lounge Chair: Step-by-Step DIY Guide
Customizing Your Chair for Extra Comfort and Style
Add personal touches like built-in cup holders, adjustable backrests, or colorful cushions to make your chair uniquely yours.
Your pool lounge chair does not have to be basic. You can customize it to fit your needs and style. For example, add a cup holder by cutting a hole in one of the armrests. Use a hole saw to create a 3-inch diameter circle. Then, insert a plastic cup holder insert from a hardware store. Another idea is to make the backrest adjustable. Use a metal hinge and a series of notches in the support arm. This allows you to recline at different angles.
Adding a Built-In Cup Holder
A hole saw attachment for your drill costs around $15. Choose a 3-inch size to fit standard cups and cans. Insert a plastic cup holder sleeve for a clean finish.
Creating an Adjustable Backrest
Use a metal hinge rated for at least 200 pounds. Cut 3 notches in the support arm at 30, 35, and 40 degrees. Insert a locking pin to secure each position.
Frequently Asked Questions About Building a Pool Lounge Chair
Q: How long does it take to build a pool lounge chair?
A: The entire project takes about 8 to 10 hours spread over two days. This includes cutting, assembly, and drying time for the sealant.
Q: Can I use regular pine instead of pressure-treated wood?
A: Regular pine will rot within one season near a pool. Pressure-treated wood lasts 5 to 10 years with proper sealing. Cedar is another good option.
Q: What is the best sealant for pool furniture?
A: Marine-grade varnish is the best choice. It resists UV rays and water damage. Apply two coats for maximum protection.
Conclusion
Building your own pool lounge chair is a cost-effective way to add comfort and style to your backyard. By following these five steps, you can create a durable, weather-resistant chair for under $100. Remember to use pressure-treated wood, predrill all holes, and apply a marine-grade sealant for long-lasting results. With proper care, your DIY chair will provide years of relaxation by the pool.