Chaise Lounge Reupholstery Cost at a Glance
The total cost to reupholster a chaise lounge depends on its size, construction, fabric price, foam condition and local labor. A simple armless piece costs less to recover than a tufted or skirted chaise with rolled arms. Use the ranges below for early budgeting, then request an itemized quote based on photographs and measurements.
| Cost item | What changes the quote |
|---|---|
| Upholstery fabric | Yardage, grade, pattern repeat, nap and stain performance |
| Labor | Arms, tufting, piping, skirt, curves and loose cushions |
| Internal repairs | Foam, webbing, springs, joints and frame damage |
| Transport | Pickup distance, stairs and oversized access |
Compare the finished quote with replacement cost, expected service life and sentimental or design value. Reupholstery usually makes the strongest case when the frame is solid, the proportions fit the room and the chair would be difficult to replace with an equivalent piece.
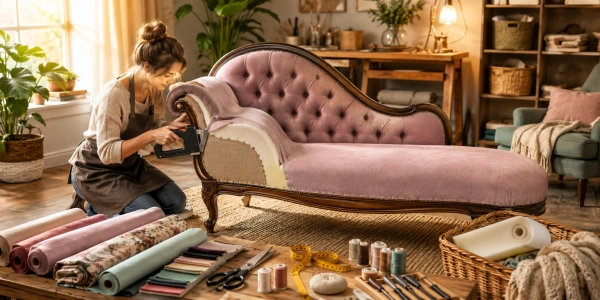
If you’re wondering about the cost to reupholster a chaise lounge, a DIY approach can save you up to 70% compared to hiring a pro. Learning how to reupholster a chaise lounge is a rewarding weekend project that can transform your space without breaking the bank. With the right tools and a step-by-step plan, you can achieve professional-looking results in just a few hours. This guide walks you through five straightforward steps to reupholster a chaise lounge, giving your furniture a fresh new look at a fraction of the cost of hiring a pro. By the end, you’ll have a custom piece that fits your style perfectly.
Gather Your Tools and Materials
Before you dive into reupholstering your chaise lounge, you need to get your supplies in order. Think of it like prepping for a weekend project—you want everything within arm’s reach so you don’t have to stop mid-way. You’ll need a staple gun with plenty of staples, a screwdriver set, fabric shears, a seam ripper, and a measuring tape. Don’t forget new foam or batting if your current padding feels flat or lumpy. For the fabric, consider something durable like a cotton-linen blend or a performance velvet—both hold up well to daily use. If you’re tackling a reclining chaise lounge or a chaise lounge chair with a curved back, you might also want a pair of curved needles for tricky corners. A friend of mine once used an old bedsheet as a test run for her chaise lounge reupholstery, and it helped her avoid costly mistakes. So, take your time gathering these items; it makes the whole process smoother.
Choosing the Right Fabric
Picking the perfect fabric is a big deal when you reupholster a chaise lounge. You want something that feels good and lasts. Look for a fabric with a high rub count (over 15,000 double rubs) for high-traffic areas. A textured weave can hide minor wear and tear, while a solid color makes the piece pop. For a more formal look, try a tweed or a microfiber. If you’re after a cozy vibe, a soft chenille works wonders. Remember, the fabric weight matters—heavier fabrics are easier to work with because they don’t shift as much. You can find great options at local fabric stores or online, but always order a sample first to see how it looks in your room’s lighting. This step ensures your chaise lounge reupholstery project turns out exactly as you imagined.
Remove the Old Upholstery
Now comes the fun part—stripping down your chaise lounge to its bones. Start by flipping the piece over and removing any screws or brackets holding the seat and back cushions. Use your screwdriver to take off the legs or any decorative trim. Then, grab your seam ripper and carefully cut along the seams of the old fabric. Work slowly to avoid damaging the foam or frame underneath. As you pull off the fabric, note how it was attached—the pattern of staples and folds is your blueprint for the new fabric. For a chaise lounge chair, you might find multiple layers, especially around the curved armrests. Lay the old fabric pieces flat and label them (e.g., “seat front,” “back panel”) so you can use them as patterns later. This step is like solving a puzzle, and once you see the bare frame, you’ll feel a sense of accomplishment.
Documenting the Process
Take photos as you remove each piece. This is a lifesaver when you’re reassembling later. Snap a picture of the staple pattern, the order of layers, and any tricky spots like where the fabric wraps around the chaise lounge’s curves. You can also jot down notes on a notepad—like “left side had extra padding” or “this seam was folded twice.” This documentation helps you avoid confusion, especially if you’re working on a chaise lounge reupholstery project over a few days. One user I know labeled her fabric pieces with masking tape and a marker, which made the cutting phase a breeze. So, don’t skip this step—it’s your safety net.
Prepare the Frame and Padding
With the old fabric gone, it’s time to inspect the frame and refresh the padding. Check for any loose joints or cracks—tighten screws or add wood glue where needed. If the foam is sagging or crumbly, replace it with new high-density foam. You can buy foam sheets from a craft store and cut them to size using an electric knife (yes, the same kind you use for carving turkeys!). For the chaise lounge’s seat, you might need a thicker layer, while the backrest can be thinner. Wrap the foam in batting to smooth out any bumps and give it a plush feel. Secure the batting with a few staples on the underside of the frame. This step is crucial because good padding makes your chaise lounge reupholstery feel like new, not just look new. Take your time here—it’s the foundation of comfort.
Related guide: How to reupholster a lounge chair – how to reupholster…
Cut and Attach the New Fabric
Here’s where your project really comes together. Lay your new fabric on a clean, flat surface, pattern side down. Place your old fabric pieces on top as patterns, aligning the grain of the fabric (the direction of the threads) with the length of the chaise lounge. Cut around each piece, leaving an extra 2–3 inches of fabric on all sides for wrapping and stapling. Start attaching the fabric from the center of each section, working your way outwards. For the seat, pull the fabric taut and staple it to the frame, spacing staples about an inch apart. Use a staple gun with a narrow nose to reach tight corners. For a chaise lounge chair with a curved back, you’ll need to make small pleats or darts to help the fabric lay flat. Test the tension as you go—too loose and it will sag, too tight and it might rip. A gentle tug is usually just right.
Working with Curves
Curves can be tricky, but they’re manageable with a few tricks. When you reupholster a chaise lounge, the armrests and headrest often have gentle curves. Clip small V-shaped notches into the fabric allowance around these curves, being careful not to cut into the seam line. This allows the fabric to bend without puckering. For tight curves, use a heat gun on a low setting to soften the fabric slightly (test on a scrap first). Another tip: use a curved needle and thread to hand-sew the fabric in place before stapling, especially on the inside of the curve. This ensures a smooth, professional finish. Practice on a scrap piece of fabric first to build your confidence.
Finishing Touches and Reassembly
You’re almost done! Once all the fabric is stapled on, trim any excess fabric close to the staples, but leave a little for security. Replace any trim, piping, or decorative nails you removed earlier—these add a polished look to your chaise lounge reupholstery. Reattach the legs and any hardware, then flip the piece right-side up. Give it a good vacuum to remove any stray threads or dust. Finally, place it in your space and step back to admire your work. You’ve not only saved money but also created a piece that reflects your style. Whether it’s a cozy reading nook or a statement piece in your living room, your revamped chaise lounge is ready to enjoy. For more tips on maintaining your upholstery, check out this guide on cleaning upholstered furniture from This Old House. Happy lounging!
Benefits of Reupholstering Your Chaise Lounge
Reupholstering a chaise lounge offers several advantages over buying new furniture. It’s cost-effective, with DIY projects saving up to 70% compared to professional services. Plus, you can customize colors and fabrics to match your decor perfectly.
- Cost savings: A professional reupholstery job can cost $500–$1,500, while DIY materials often run under $200.
- Eco-friendly: Reusing your frame reduces waste in landfills.
- Personalization: Choose a fabric that reflects your style, from bold patterns to neutral tones.
Common Mistakes to Avoid
When you reupholster a chaise lounge, avoid these pitfalls to ensure a smooth project. First, don’t skip measuring twice—cutting fabric wrong wastes material and time. Second, never rush the padding step; lumpy foam ruins the final look. Finally, avoid over-stapling, which can weaken the frame over time.
Frequently Asked Questions
Q: How long does it take to reupholster a chaise lounge?
A: For a beginner, expect 6–10 hours spread over a weekend. Experienced DIYers can finish in 4–6 hours.
Q: What tools do I need to reupholster a chaise lounge?
A: Essential tools include a staple gun, screwdriver set, fabric shears, seam ripper, measuring tape, and curved needles for tight areas.
Q: Can I reupholster a chaise lounge without removing the old fabric?
A: It’s not recommended. Removing old fabric reveals the frame’s condition and provides exact patterns for cutting new fabric.
Q: What is the best fabric for a chaise lounge?
A: A fabric with a high rub count over 15,000 double rubs, like cotton-linen blend or performance velvet, is ideal for durability and comfort.
Conclusion
Reupholstering a chaise lounge is a rewarding DIY project that saves money and adds personal flair. By following these five steps—gathering tools, removing old fabric, prepping the frame, cutting new fabric, and finishing touches—you can transform your furniture in a weekend. Start your project today and enjoy a revamped chaise lounge that looks custom-made.